
Getting Paid
In this chapter, we will cover:
Configuring the PayPal gateway Configuring the Simplify Commerce gateway Configuring the Stripe gateway Enabling HTTPS on checkout Enabling HTTPS on specific pages Tracking e-commerce transactions with Google Analytics Creating an invoice Adding a fee per gateway using the Payment Gateway based Fees extension
Introduction
By default, you can only accept checks, which is, let’s be honest, not very useful. Most e-commerce stores don’t accept bank transfers or checks. The joy of e-commerce is receiving instant payment and fulfilling the order that very day.
The first three recipes in this chapter show you how to—set up three different payment gateways, all of which allow you to accept payment on the spot. They all do it in slightly different ways, and you may want to set up multiple options for your store. The first two gateways are included in WooCommerce. The third recipe is for Stripe, which has a very good reputation on the Web, it requires an extension from WooThemes.com.
Once you get payment options set up on your store, you may want to do a few more things. Adding Secure Sockets Layer (SSL) to your site will make it more secure, tracking e-commerce transactions will make your Google Analytics reports more useful, and you can even add fees to certain gateways so that you can encourage users to use a particular gateway.
Configuring the PayPal gateway
PayPal is a place where people who frequently spend money online can park their money until they need to spend it. Accepting money online via PayPal is very common, and some users prefer to spend money on PayPal rather than share their credit card details with an unknown site. PayPal can also work for people who don’t have a PayPal account and want to use a credit card.
Getting ready
You need to sign up for a PayPal account at https://www.paypal.com/signup/ account.
How to do it…
There are quite a few steps to setting up PayPal. Luckily, not all of them are required. The first part will allow you to capture payments immediately. In order to configure the PayPal gateway, go through the following steps:
- From the WordPress admin, go to WooCommerce | Settings | Checkout. From here, you can access all of the WooCommerce payment options.
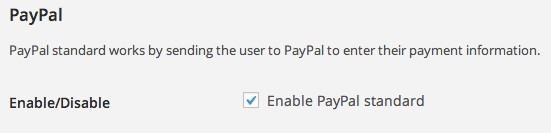
- Click on PayPal.
- Scroll down and click on Save changes.
You can check the Debug Log field. It can be very hard to find errors that happen on transactions using PayPal without the logs; having the PayPal logs available will save a lot of time in trying to diagnose what’s causing the transaction to fail.
At this point, you can capture payments. With a few extra settings filled in, you can process refunds from within WooCommerce, which is a big time saver.
- Scroll down to API Credentials:
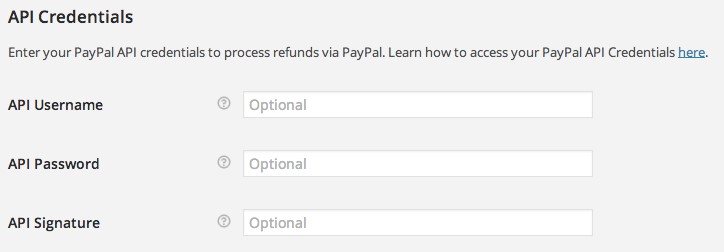
- Follow the link to the PayPal website to get your API information.
- Fill out API Username, API Password, and API Signature.
- Click on Save changes.
Some web hosts have problems with the way PayPal notifies the store of a successful transaction, which is called Instant Payment Notification (IPN). If you are seeing a payment marked as complete in PayPal but not in WooCommerce, then you can fill in the PayPal Identity Token field. This will allow PayPal to use a different protocol for notifying your site.
There’s more…
There are some people who will only use PayPal and others who refuse to use PayPal altogether. Many stores handle this by providing PayPal as well as one other gateway to handle credit cards.
The PayPal gateway included in WooCommerce is known as PayPal standard. Note, however, that it doesn’t include the advanced functionality included with some PayPal business accounts. If you need that functionality, there are several PayPal extensions available on WooThemes.com.
Configuring the Simplify Commerce gateway
In WooCommerce 2.2, the Simplify Commerce gateway was added to WooCommerce. This is huge news, because Simplify Commerce is a really user-friendly gateway and it processes credit cards without taking you to another site (unlike PayPal). Simplify Commerce is pretty easy to set up and doesn’t require a merchant account as some older processors do. If you’re just getting started, Simplify Commerce is an excellent payment gateway to use.
Simplify Commerce is only available to merchants in the United States. If your store location is set to another country, you won’t see the gateway.
Getting ready
An SSL certificate is required to process actual credit cards. Contact your host about setting one up on your site. You don’t need an SSL certificate for testing.
There are some other technical hardware requirements listed at http://docs.woothemes.
com/document/simplify-commerce/.
How to do it…
In order to configure the Simplify Commerce gateway, go through the following steps:
- From the WordPress admin, go to WooCommerce | Settings | Checkout.
- Click on Simplify Commerce.

- Check the Enable Simplify Commerce field.
- Fill out the Public Key and Private Key fields.
- Click on Save changes.
At this point, you can charge credit cards. It’s advisable to do a few test orders. To do those, you’ll need to enter your sandbox API credentials.
- Check the Enable Sandbox Mode setting. Note that the Public Key and Private Key fields are replaced with Sandbox Public Key and Sandbox Private Key.
- Fill out the Sandbox Public Key and Sandbox Private Key fields.
- Click on Save changes.
By default, the Description field will say something like Pay with your credit card via Simplify Commerce by Mastercard. I suggest simplifying this to Pay with your credit card. Most customers don’t know or care what Simplify Commerce is. They just know that they want to pay with their credit card.
Configuring the Stripe gateway
Stripe is a modern payment processor that combines a traditional payment gateway and merchant account into one service. That makes it possible to set up the gateway in a matter of minutes. The ease of setup along with simple pricing and a well-documented API has made Stripe one of the most popular gateways for web developers.
Getting ready
It’s best to open a Stripe account before reading or going through this recipe. You’ll need to enter your important business details like business tax ID number if you’re in the US. You’ll also need the WooCommerce Stripe plugin (available on WooThemes.com) installed and activated on your site.
An SSL certificate is required to process actual credit cards. Contact your host about setting one up on your site. You don’t need an SSL certificate to set up the plugin or test.
How to do it…
In order to configure the Stripe gateway, let’s take a look at the following steps:
- From the WordPress admin, go to WooCommerce | Settings | Checkout.
- Click on Stripe.
- Check the Enable Stripe field.
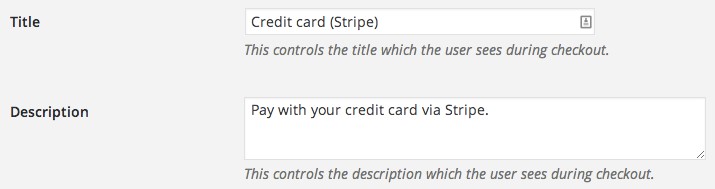
By default, the Title and Description field will say something like Pay with your credit card via Stripe. I suggest simplifying this to Pay with your credit card. Most customers don’t know or care what Stripe is. They just know that they want to pay with their credit card.
- Log in to your Stripe account and copy your Live Secret Key, Live Publishable
Key, Test Secret Key, and Test Publishable Key into the corresponding fields in WooCommerce. You can also go straight to the API keys in your Stripe account via https://dashboard.stripe.com/account/apikeys.
If you usually ship your products a day after receiving the order, I recommend leaving the Capture charge immediately setting checked. If it takes you a few days, then I recommend unchecking that field and manually charging the customer when you ship the product. You should technically only charge the customer once the order has shipped, but it’s most likely not worth the hassle if you ship the product within 24 hours.
- Click on the Save changes button.
To make checking out a bit easier for your customers, it’s nice to remember their credit card number. You can do that by checking the Enable saved cards field. WooCommerce never stores credit card numbers, but it can remember credit card tokens, which is something that a gateway will send to WooCommerce after a transaction. It’s something only your Stripe account can use for further orders, and if someone hacks your site there’s no chance of them getting the credit card number. This means you don’t have to worry about PCI compliance.
There’s more…
With Stripe, you need an SSL certificate and you’ll have to protect your checkout page. In the following recipe, we’ll show you how to do that.
Enabling HTTPS on checkout
If you’re using a payment gateway that has the users enter their credit card number on your site, you’ll need an SSL certificate installed on your site and you’ll have to enable HTTPS on your site to protect your visitors’ information.
Official WooThemes.com payment gateways that should use an SSL certificate will not work without one. This is a good thing, because you can’t set it up wrong and then be liable for stolen credit card numbers.
There are some payment gateways that look like you’re entering a credit card number on your site, but they might be using technology to embed a secure page within your site. If you’re using a WooThemes plugin, don’t worry about it. All of those plugins have been audited and are secure. If they require an SSL certificate, they will be clearly documented.
If you’re using a plugin from a third party, it’s worth checking with the developers to make sure everything is secure.
Getting ready
Before you can enable HTTPS on any page, you need to have an SSL certificate installed on your site. You can contact your host to help you with this.
How to do it…
In order to enable HTTPS on checkout, refer to the following steps:
- From the WordPress admin, go to WooCommerce | Settings | Checkout.
- Check the Force secure checkout setting:
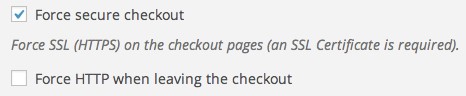
Checking the Force secure checkout setting will make the Force HTTP when leaving the checkout setting appear. You can enable this setting if you like, but there’s not much of a gain to force people to use HTTP on other pages. It could also conflict with another plugin. I recommend leaving this setting off.
- Click on Save changes.
There’s more…
Users entering credit cards isn’t the only time you should use HTTPS. It’s also recommended to put it on any page with a password or other sensitive information. For that reason, it’s worth using additional plugins to secure login pages. We’ll cover that in the next recipe.
Enabling HTTPS on specific pages
Whenever users enter sensitive information, you should protect that information by making the page secure (HTTPS). This information could be credit card details, passwords, health information, or personal information such as social security numbers. By using HTTPS, you prevent other people from reading the communication between your website and the end user.
One of the pages automatically created when you install WooCommerce pages is a My Account page. Since users could enter a password on that page, it’s worth securing that page.
Getting ready
Before you can enable HTTPS on any page, you need to have an SSL certificate installed on your site. You can contact your host to help you with this.
How to do it…
There’s an easy-to-use plugin to help us with this. We’ll have to install the plugin and then configure it to protect pages on our site by performing the following steps:
- In the WordPress admin, click on the Plugins menu and then click on Add New.
- Search for the WordPress HTTPS plugin.
- Install and activate the plugin.
You should now see a new menu in the WordPress admin called HTTPS. We need to perform a certain action on the frontend of our site and then we will be ready to use those new settings.
- Go to the frontend of your site and navigate to the My Account page. It should have been automatically created with the rest of the WooCommerce pages.
- Copy the URL of the page, as shown in the following screenshot:

- Go back to the WordPress admin.
- Click on the HTTPS menu.
- Paste the URL in the URL Filters meta box, as shown in the following screenshot:
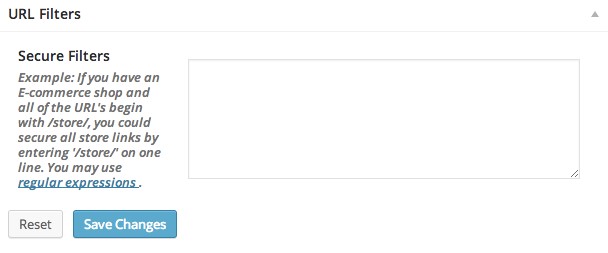
At this point, we’ve protected the My Account page. You can repeat this process for any other pages where you ask the user for sensitive information.
- Click on Save Changes.
If you go to the frontend of your site, you should be able to go to the My Account page and it should automatically load in HTTPS.
There’s more…
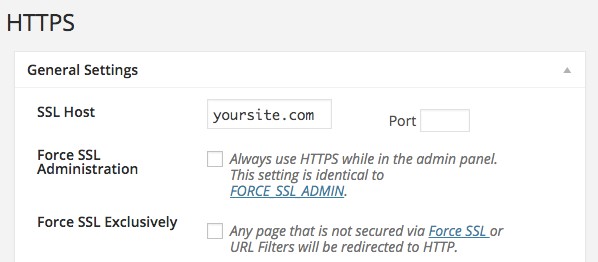
There’s another login page we haven’t yet protected. It’s worth protecting your main admin page. You can do this by enabling the Force SSL Administration setting in the General Settings panel on the settings page of HTTPS:
| Tracking e-commerce transactions with |
| Google Analytics |
If you’re building your first e-commerce store, you might think that getting a lot of traffic to your site is always good. While traffic is usually good, it helps if you can figure out whether your traffic is actually buying. When you send e-commerce data to Google Analytics, you can figure out exactly which traffic is buying. You could see that users from Facebook typically spend $5–10 whereas users who come from your newsletter spend $50–100. Now that you have the numbers, you can make more informed decisions.
This is one of the steps that I recommend for every single e-commerce store. Even if you don’t plan on using the data, it will only take a few minutes to set up. Moreover, if you decide you want to use the data down the line, you will have a huge backlog of data.
Getting ready
You should already have a free Google Analytics account set up for your website. You should also be using a plugin to send your non-e-commerce traffic data to Google Analytics. A good plugin to do that is Google Analytics by Yoast.
How to do it…
The ability to track Google Analytics data used to be included in WooCommerce, until WooCommerce 2.1. At that point, the functionality was put into a free plugin for the ease of updating both WooCommerce and the Google Analytics Integration plugin. We need to install that plugin and then configure a few settings.
- In the WordPress admin, click on the Plugins menu and then click on Add New.
- Look for the WooCommerce Google Analytics Integration plugin.
- Install and activate the plugin.
There is one setting we need to configure in your Google Analytics account. You need to enable E-Commerce tracking. It should take a few clicks to enable the setting. You can follow their official instructions at https://support.google.com/ analytics/answer/1009612?hl=en.
Alright, we’ve got the plugin installed—your Google Analytics account is configured and ready. We just need to check a few boxes to send the right data to Google Analytics.
- From the WordPress admin, go to WooCommerce | Settings | Integration.
If this is the only integration you’ve added, then Google Analytics Integration will pop up. If you’ve added multiple integrations, you’ll have to click on Google Analytics.
- Fill out your Google Analytics ID. You can find your Google Analytics ID in Google Analytics under your list of sites, as shown in the following screenshot:

- Make sure you leave Add tracking code to your site unchecked.
You could use this plugin for all Google Analytics tracking, but other plugins have more options. I always advise people to use a separate plugin like Google Analytics by Yoast for tracking non-e-commerce data.
- It’s advisable to use the new Universal Analytics features rather than the classic features. If you have an older Google Analytics account, you’ll have to first convert your account to a Universal account and then check the Use Universal Analytics setting instead of Classic Google Analytics setting. If you created an account mid-2014 or later, it should already use Universal Analytics.
- Check the Add eCommerce tracking code to the thankyou page setting.
- Click on Save changes.
There’s more…
With Universal Analytics, there’s a new feature called Enhanced E-Commerce, which gives you more data you can use. This feature is on the roadmap for the Google Analytics plugin and should be completed in early 2015. Once that feature is available, you should absolutely use it to track as much data as possible.
There is a WooCommerce Google Analytics Pro plugin, which is currently in development.
It does the same thing but uses advanced server-side tracking to send the data to Google Analytics. This can be useful for getting more accurate data. From what was heard of the reports at the time of this writing, this plugin should be released by mid-2015.
Creating an invoice
For some stores, you need to create quotes or invoices for clients instead of being able to give them the typical e-commerce checkout experience. Maybe you need to calculate a custom shipping cost, give the user special pricing, or adjust the order to the quantities you actually have available.
Whatever the reason, you can manually create an invoice for a customer and send it to them. They can then view the invoice and pay for it.
How to do it…
For this recipe, we’ll have to manually create a new order, assign the order to your customer, add all of the costs, and then send it to the customer.
- From the WordPress admin, go to WooCommerce | Orders.
- Click on Add Order:

- Leave Order status as Pending Payment:
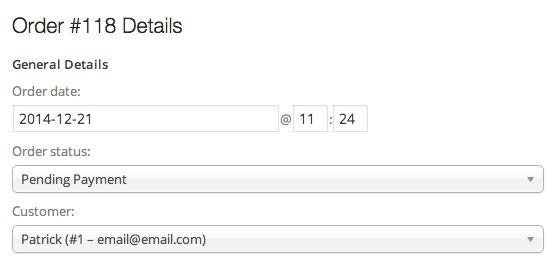
- Select your customer from the Customer dropdown.
It’s much easier to already have the customer in your system.
If you have a few extra moments, it’s worth adding the customer to your site by going to Users | Add New and adding all of their details. When you’re adding them, make sure to change their Role to Customer.
- Click on the pencil icon next to Billing Details.
- Click on Load billing address to load all of your customer details. If you don’t have the customer in your system, you can manually fill out their billing details. You must fill out the Email field for them to receive any e-mails:

We’ve set all of the customer details. Now we need to configure the order itself. We’ll have to add products, shipping costs, and taxes.
- Click on Add line item(s):
- Click on Add product(s).
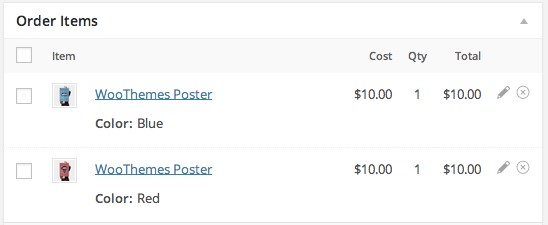
- Follow the directions in the pop-up window to add as many products as you like:

- Once you’ve added the products to the order, you can adjust the quantities and product price by clicking on the pencil icon to edit the line item:
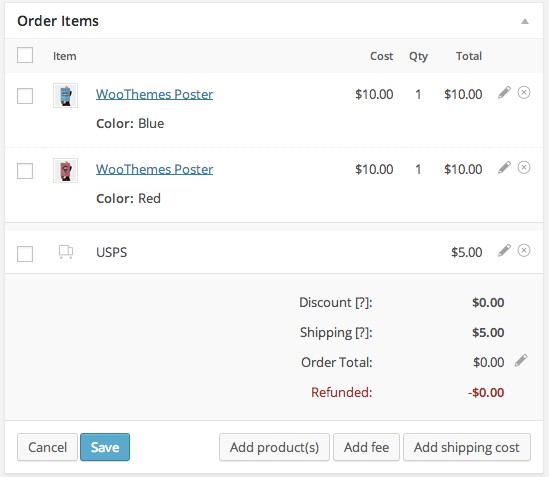
- Click on Add shipping cost and then click on the pencil icon to manually enter the shipping cost and the name of the shipping cost as it appears to your customer (for example, USPS).
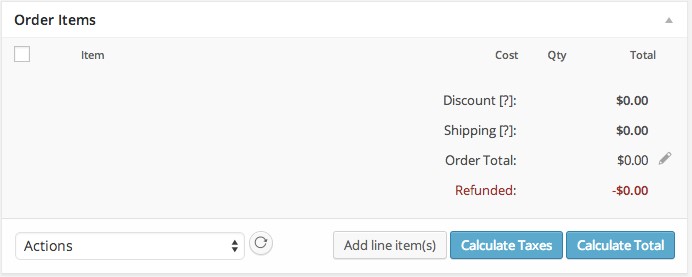
- Once you’ve added all of the products and shipping costs, click on the Save button:
- Click on Calculate Taxes:
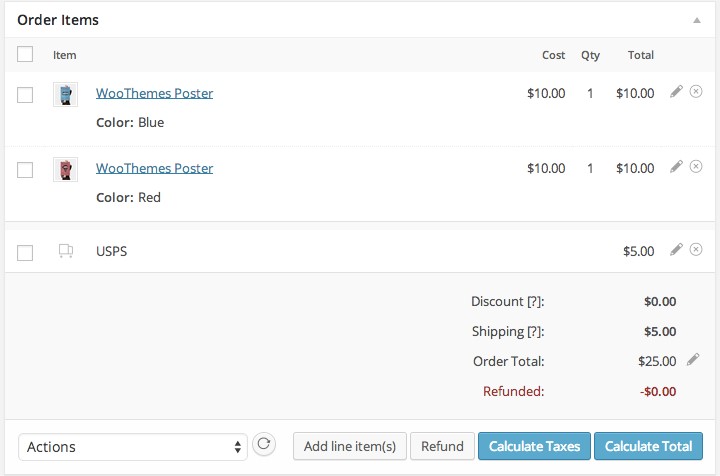
- Click on Calculate Total.
Alright, we’re all done manually creating an order. Now we just need to send it to the customer.
- Scroll up and click on Save Order.
This will send out an e-mail to the customer, letting them know that they have a pending order, with a link to pay for the order. The pending order can also be found on their My Account page.
| Adding a fee per gateway using the |
| Payment Gateway based Fees extension |
Most store owners have preferences when it comes to using certain payment gateways. You might prefer most of your revenue going through a payment gateway that accepts credit cards, like Stripe, but still allow users to use PayPal. For situations like this, you can charge an extra fee on the order based on the payment gateway, to encourage users to use the cheaper option.
Getting ready
You should install and activate the Payment Gateway based Fees extension available on WooThemes.com.
How to do it…
In order to add a fee per gateway using Payment Gateway based Fees, go through the following steps:
- From the WordPress admin, go to WooCommerce | Settings | Additional Fees.
- Click on the payment gateway that you’ll be adding a fee to:

- Check the Enable additional fees on total cart value for this gateway setting.
- Select how you’d like to charge the additional fee in the Type of additional fee dropdown.
Personally, I prefer the Fixed amount setting because it’s simple for customers to understand.
- Enter the additional fee in the Value to add field.
- Click on Save changes.
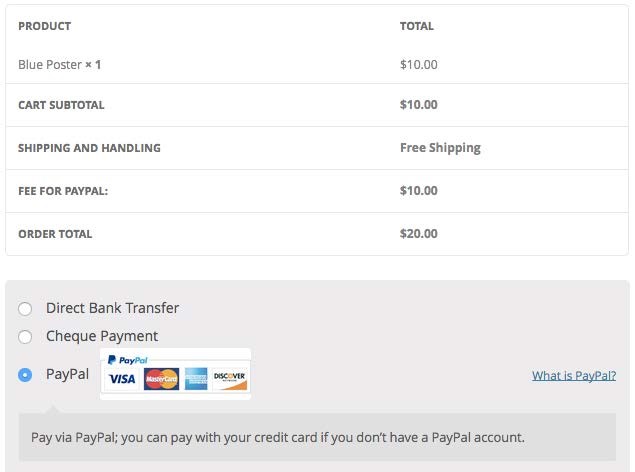
During the checkout experience, you’ll now see a fee when you select a payment gateway with a fee:
There’s more…
In this recipe, I have only covered the options you need to get started. There are a few more options you can tweak to get it working just the way you want. For a full list of options, see the documentation for this plugin at http://docs.woothemes.com/document/paymentgateway-based-fees/.