
Running a Membership Site
In this chapter, we will cover:
Adding a subscription product with the WooCommerce Subscriptions plugin Creating pricing tables with the Easy Pricing Tables plugin Adding member-only pricing with the Dynamic Pricing plugin Displaying special pricing for logged-in users with the Conditional Content plugin Creating members-only content Creating a members-only store Making subscription payments more consistent Customizing the subscription price string Creating a custom subscription interval Exporting subscription orders
Introduction
Now that we know how to add products to our store and customize the way it looks and is organized, it’s time to branch out and look at how we can sell things other than t-shirts. Being able to bill someone every week, month, or year is incredibly challenging on a technical level. Many e-commerce platforms can’t do it at all and the ones that do usually have high monthly fees and limitations. The WooCommerce Subscriptions plugin is phenomenally good at selling memberships and runs entirely on your own website, so you don’t have to pay monthly fees.
Once you start billing people regularly, you can set up all types of membership sites: sites that have special pricing for members, sites that only allow members to purchase items, sites where members get access to premium content, and, of course subscription websites that will send users a package every week, month, or year.
The vast majority of the recipes in this chapter require the WooCommerce Subscriptions plugin (http://www.woothemes.com/products/woocommerce-subscriptions/), which is a premium extension for WooCommerce, to be installed and activated. Recurring
billing is very complex and not all payment gateways work with Subscriptions. It’s worth reading through the documentation located at http://docs.woothemes.com/document/ subscriptions/payment-gateways/#section-1 to make sure your payment gateway is compatible. Both Simplify Commerce and PayPal Standard, which are included in the WooCommerce core, are compatible with Subscriptions.
| Adding a subscription product with the |
| WooCommerce Subscriptions plugin |
Before being able to bill someone regularly, we’ll have to set up a product that has special subscription billing details. Subscription products are very similar to simple products and only take a few extra steps to set up.
Getting ready
You must have the WooCommerce Subscriptions plugin installed and activated on your website.
How to do it…
In order to add a subscription product with the help of WooCommerce Subscriptions, implement the following steps:
- From the WordPress admin, go to Products | Add New.
- Add a Product name and Description as you would for any other product.
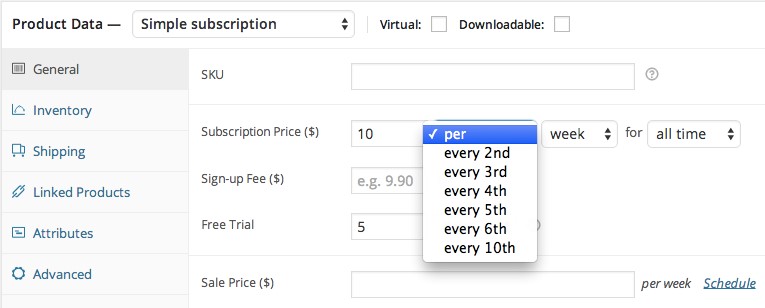
- Scroll down to the Product Data panel and change the product type to Simple subscription. You’ll see several new fields appear.
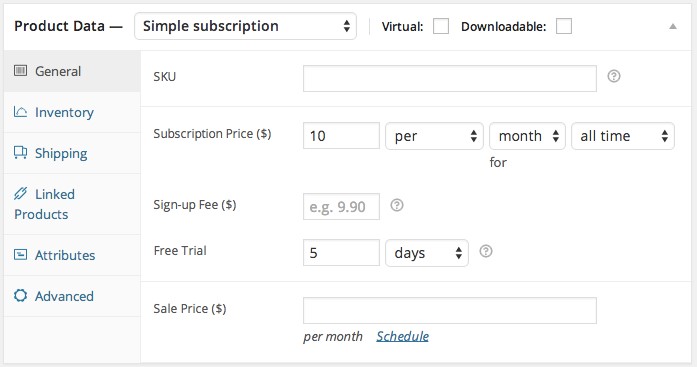
- For a subscription product, you must fill out the Subscription Price ($) field. The Sign-up Fee and Free Trial fields are optional. You can also change the billing period right next to the Subscription Price field.
- Click on the Publish button.
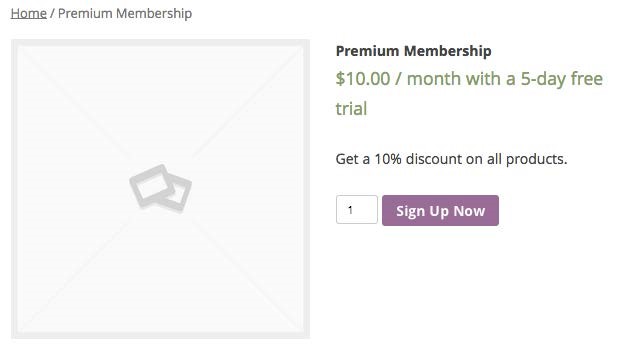
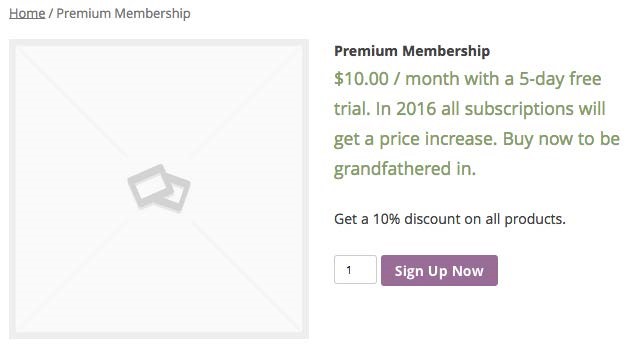
You can now see your subscription product on the frontend of your site.
There’s more…
You’ll notice that in addition to the Simple subscription product type, there is a Variable subscription product type. These work just like Variable Products, with the added subscription fields. If you have very similar subscriptions, it may be worth putting them all under one Variable subscription product type to save space in your store.
Creating pricing tables with the Easy Pricing Tables plugin
If you’re offering different subscriptions with similar features, it’s really nice to help the customer understand which subscription is the right one for their budget. One of the best ways to do this is to create a pricing table that highlights the differences at a glance. The WordPress ecosystem already has a pricing tables plugin available for free on the WordPress. org plugin repository.
Getting ready
You must have the WooCommerce Subscriptions plugin installed and activated on your site. You should also have two Simple subscription products set up on your site.
How to do it…
There are three parts to this recipe. The first part of this recipe involves installing the right plugin.
- From the WordPress admin, go to Plugins | Add New.
- Run a search for the Easy Pricing Tables Lite by Fatcat Apps plugin.
- Install and activate the plugin.
Now that we have the plugin installed, we need to create a pricing table.
- In the WordPress admin, you’ll see a new menu item called Pricing Tables. Go to Pricing Tables | Add New.
- Enter a name for the pricing table.
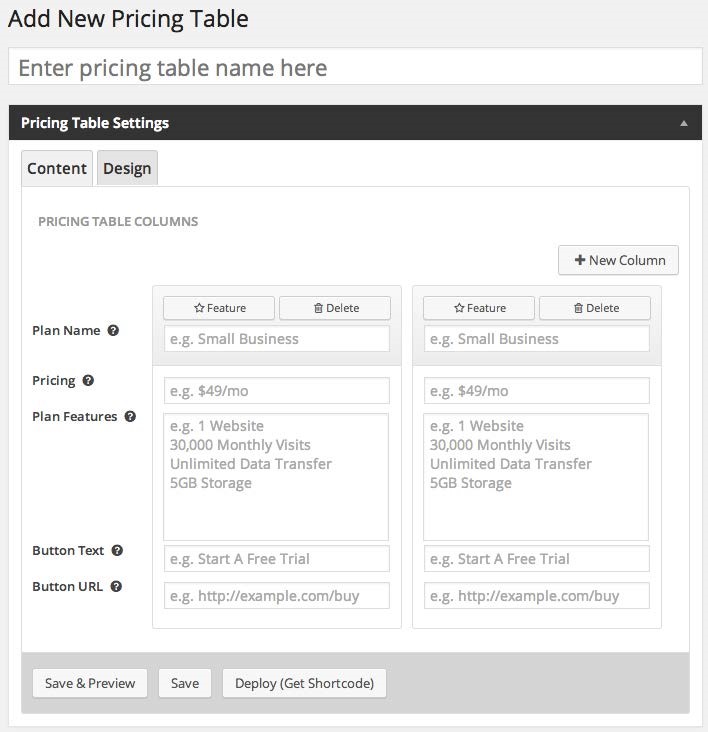
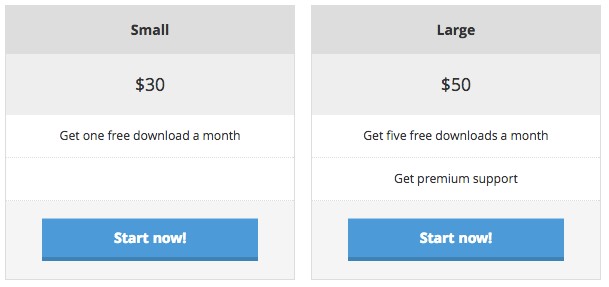
- For each of your subscription products, you’ll want to enter a Plan Name, Pricing, and Plan Features (one per line).
- You should also fill in the Button Text, which can be something as simple as Subscribe.
- Finally, you should fill in the Button URL. The easiest way to get the pricing table to work with WooCommerce is to enter the URL for your subscription product.
If you enter the the URL for your product page into the Button URL, that will take the customer to the subscription product page and they have to click one more time to add it to the cart. If you want it to be done in one step, you’ll have to create a URL that automatically adds a product to the cart. It sounds complicated, but can be done
in a step-by-step manner. I’ve already documented how to do this
on my blog at: http://speakinginbytes.com/2014/06/ create-pricing-table-woocommerce/.
- Once you’re done putting your product information into the pricing table, click on the Save button.
Now we have a pricing table, but we have to put it somewhere on our site.
-
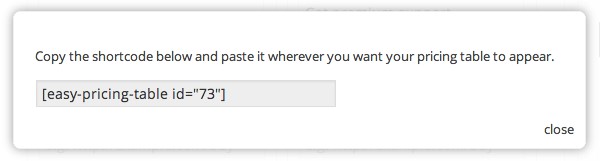
- Click on the Deploy (Get Shortcode) button. A pop-up will appear. Copy the shortcode from the pop-up.
-
- You can now paste this shortcode into the content of any existing WordPress page or post and it will display the pricing table. You could, of course, create a new WordPress page or post if you like. Save the page and it should look something like the following screenshot:
There’s more…
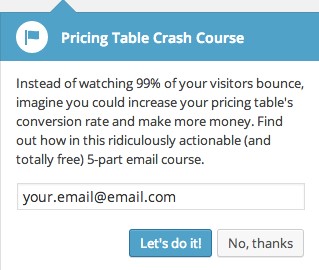
You may notice when you install the Easy Pricing Tables plugin that there’s a prompt for you to join a Pricing Table Crash Course. I highly recommend this crash course. It goes into the fundamentals of pricing and can help you convert more visitors into customers and also possibly raise your prices.
The Easy Pricing Tables plugin has some prebuilt styles that you can modify so you don’t have to custom-code CSS. When you’re editing the pricing table, you will see a Design tab. Click on that tab and take a look at all of the design options built into the plugin.
| Adding member-only pricing with the |
| Dynamic Pricing plugin |
It’s nice to give your regular customers a loyalty program that keeps them coming back and gives them some amount of brand loyalty. One of the ways of doing this with WooCommerce is to let customers buy a premium membership that gives them a percentage reduction on all sales. This can be achieved by combining the WooCommerce Subscriptions and Dynamic Pricing (http://www.woothemes.com/products/dynamic-pricing/) plugins. Of course, both are available at WooThemes.com.
Getting ready
You must have the WooCommerce Subscriptions plugin as well as the Dynamic Pricing plugin installed and activated on your site.
How to do it…
We’ll be going into the Dynamic Pricing settings and configuring some price discounts for any user that is currently subscribed to a subscription.
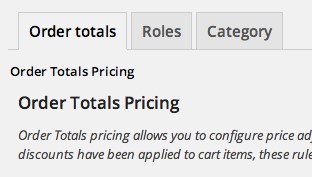
- In the WordPress admin, click on WooCommerce and then on Dynamic Pricing.
- Click on Roles.
- On the Role Pricing page, you can now set up special pricing rules for specific roles. The role we want to target is the Subscriber role. Enable special pricing for Subscriber and enter the type of discount and the amount.
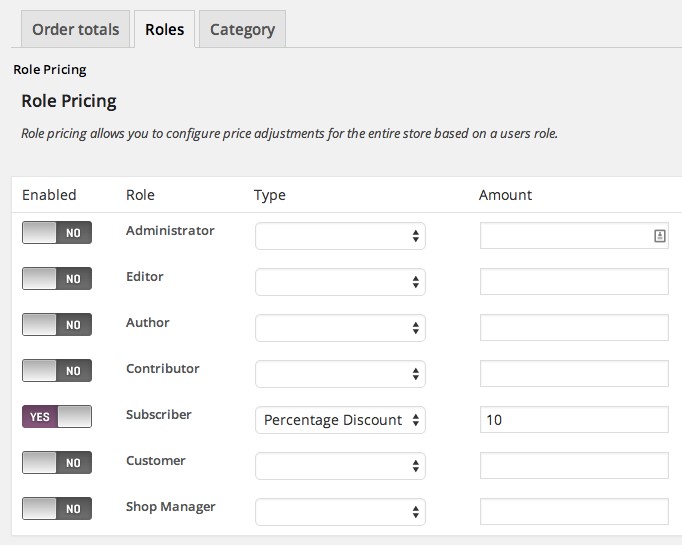
A subscriber will see a discount on the frontend.

How it works…
WordPress already has the role functionality built into it, and the two plugins—WooCommerce Subscriptions and WooCommerce Dynamic Pricing—work together beautifully to take advantage of those roles. Subscriptions will automatically change a customer’s role from Customer to Subscriber while their subscription is active and then change them back to a Customer after the subscription has expired or been cancelled. When a user is logged in, the Dynamic Pricing plugin will automatically calculate, and provide the user with, the correct price for their role.
There’s more…
If you want to take this to the next level, Dynamic Pricing also integrates with the Groups plugin. You could look into using the free-of-charge Groups plugin (https://wordpress. org/plugins/groups/) with the premium Groups for WooCommerce plugin (http:// www.woothemes.com/products/groups-woocommerce/) to create many different types of membership levels and discounts.
| Displaying special pricing for logged-in |
| users with the Conditional Content plugin |
If you are using Dynamic Pricing or some other pricing plugin to create special prices for users, you should display that content to customers. This is especially useful if you have bulk pricing, where the discounts aren’t automatically visible to customers. In this recipe, we’re going to show a special message to customers who aren’t a part of our premium membership and show them how much they could be saving if they were a premium member.
Getting ready
You must have WooCommerce Subscriptions, Dynamic Pricing, and Conditional Content (http://www.woothemes.com/products/woocommerce-conditional-content/) installed and activated on your site.
How to do it…
To display special pricing for logged-in users with conditional content, let’s take a look at the following steps:
- From the WordPress admin, go to WooCommerce | Content Blocks.
- Click on Add Content Block.
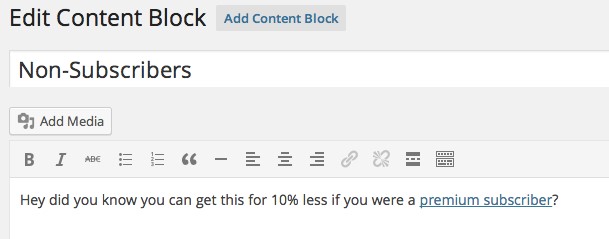
- Enter a title for the content block and then add a description.
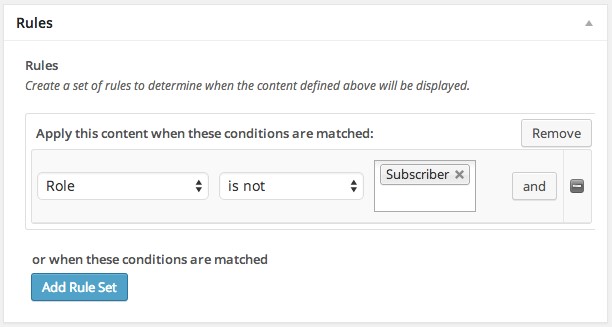
- Now scroll down to the Rules panel. This is where we’ll be using some conditional content logic to only display this message to non-subscribers. In our case, we’ll want to create a rule that displays only when a user doesn’t have the Subscriber role.
- Click on Publish.
There’s more…
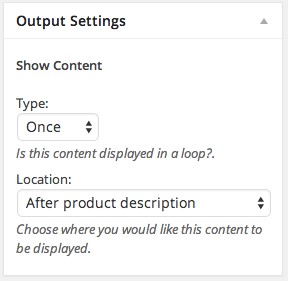
You can not only control when this message is shown with this extension, but you can also control where it’s shown. On the Add Content Block page, there’s a panel in the sidebar called Output Settings. This allows you to choose how often and where the message gets displayed.
Creating members-only content
One of the many uses of WooCommerce is to create a membership site. Using a few extra plugins, you can create premium content that’s only available to users who have purchased the correct products from your site. The nice thing about this setup is that, if you want your membership site to sell any products, it’s really easy to add that functionality, whereas a typical membership plugin will only allow memberships.
Getting ready
You must have WooCommerce Subscriptions, Groups (free-of-charge on WordPress.org), and Groups for WooCommerce (premium, available at WooThemes.com) installed and activated on your site. You should also have a Simple subscription product already created.
How to do it…
We’re going to use a free plugin called Groups, which allows us to group our users and restrict content to specific groups. After creating the groups and the content, we’ll be connecting a product to a group with Groups for WooCommerce.
- In the WordPress admin, click on Groups.
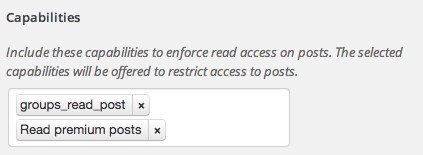
- Go to Groups | Capabilities.
- Click on New Capability.
- Add a name for this capability. Something like Read premium posts is a pretty good name.
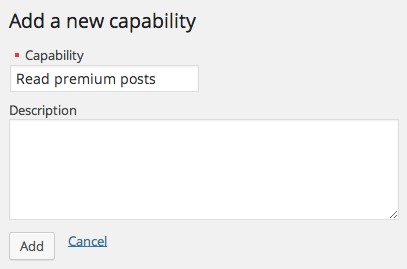
- Click on the Add button.
- Click on New Group.
- Enter a Name for the group.
- Enter the name for your group such as Premium Content will work well.
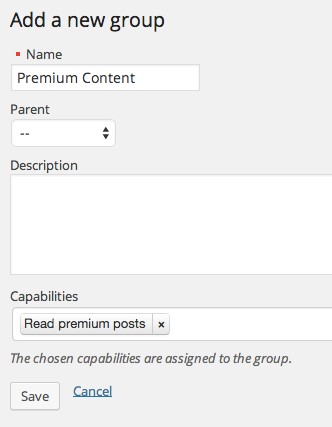
- Click on the Save button.
We’ve created a group and a capability. We need to tell Groups that this capability can be used to restrict access.
-
- Go to Groups | Options.
- Under Capabilities, add the new capability we have created.
At this point, we’ve created a group, created a capability, assigned that capability to a group, and told Groups the capability can be used to restrict content. Let’s create a page that only that group can access:
-
- Go to Pages | Add New.
- Add a title and content as you would on any other WordPress page.
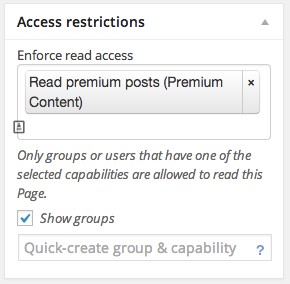
- In the sidebar, you should see an Access restrictions panel. Here, you can enter the capability you have created.
-
- Click on Publish.
Alright. At this point, we’ve successfully restricted the page to our premium group.
If you log out of your site and try again, there should be no way for you to access the page. It shouldn’t appear in the menus and, if you access the URL directly, you should hit a 404 page.
Now we need to connect a product to the group we have created.
-
- In the WordPress admin, click on Products and navigate to an existing subscription product in your store.
- Scroll down to the Product Data panel.
- Click on the Groups tab.
- In the Add to Groups field, enter the name of the group you created earlier.
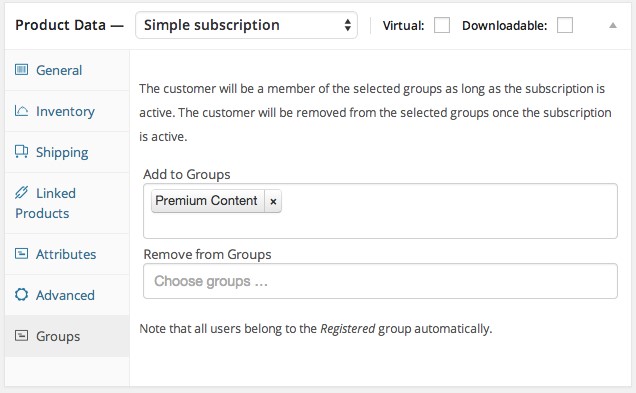
The product itself won’t mention anything about the Group or the special privileges you added. The benefits of being a member should be typed in manually.
Creating a members-only store
To give your site a more exclusive feel, you could make it members only. You could show the products to anyone but only allow registered users to actually purchase them. You could then have an application form somewhere on your site that could collect their payment information. With a bit of magic from the Catalog Visibility Options plugin, you can easily control what types of users can see your products and how much information they see.
Getting ready
You must have the Catalog Visibility Options plugin (http://www.woothemes.com/ products/catalog-visibility-options/) installed and activated on your site.
How to do it…
To create a members-only store, carry out the following steps:
- From the WordPress admin, go to WooCommerce | Settings.
- Click on the Visibility Options tab.
- Change the Purchases setting to Enabled for Logged In Users.
- Add a message in the Alternate Content field to direct the users to the application form on your site.
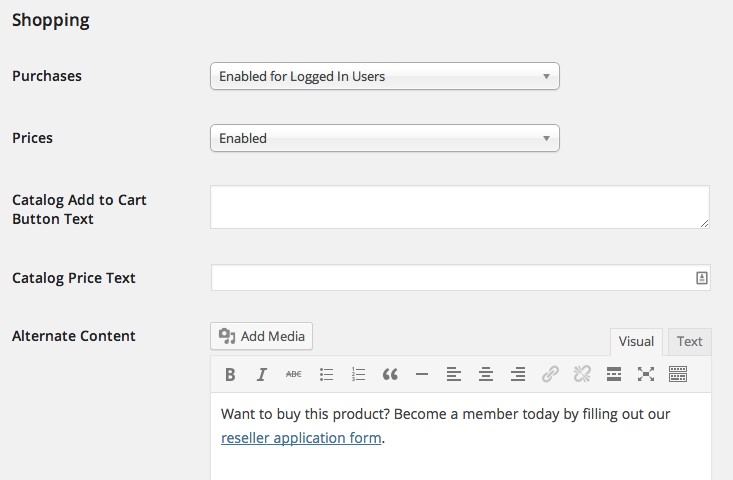
If you log out and go to the product page, you’ll notice the absence of a purchase button and a message directing the user to the application form.

This book won’t go into how to make contact forms in WordPress.
One very flexible form-building plugin is Ninja Forms, available at WordPress.org for free. A simpler but slightly less powerful form plugin is the Contact Form module built into the Jetpack plugin, which is also available for free on WordPress.org.
| Making subscription payments more |
| consistent |
One of the best parts about WooCommerce Subscriptions is that it runs on your own site. This means you can avoid a lot of fees that you would need to pay if you were to use other services. The downside to running it on your own site is that it uses the scheduling functionality built into WordPress, which relies on people visiting your site. If you don’t have people visiting your site, then certain tasks won’t happen. For large sites, this isn’t a problem at all, but for smaller sites, you could have a subscription payment run a day late because no one visited the site the previous day.
With a few free tools, you can get around this issue by using services that ping your site every few minutes. That will ensure all of your subscription payments go off at the right time.
How to do it…
In order to make subscription payments more consistent, follow these steps:
- From the WordPress admin, go to Plugins | Add New.
- Run a search for the Jetpack by WordPress.com plugin.
- Install and activate the plugin.
- In the WordPress admin, you should see a notice asking you to Connect to WordPress.com.
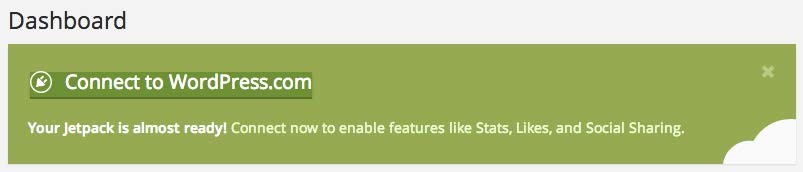
- Connect to WordPress.com. If you have an account, you only need to log in. If you don’t have an account, you can create one for free and then log in.
Now that we have Jetpack installed and connected to WordPress.com, we can use all of the features included in the plugin. The final thing we need to do is turn on the right Jetpack module.
- Go to Jetpack | Settings.
- Scroll down to Monitor, hover over it, and click on the Activate link.

How it works…
WordPress.com will check your site every few minutes, which will make sure any of your scheduled actions are on time. It will also send you an e-mail if you website ever goes down.
Customizing the subscription price string
If you’re running a subscription site, there are bound to be things you want to customize to make your website reflect your brand. Subscriptions are loaded with hooks that developers can use to customize all sorts of things programmatically. We’ll be manipulating the Subscriptions price string using a filter just to show how things are done.
Getting ready
You must have the WooCommerce Subscriptions plugin installed and activated on your site.
How to do it…
In order to customize the subscription price string, go through the following steps:
- Open up your theme’s functions.php file, located under wp-content/themes/ your-theme-name/, or create a custom WooCommerce plugin and open up that file.
- Add the following two lines of code. These tell Subscriptions to look for your modifications to the price string:
add_filter( ‘woocommerce_subscriptions_price_string’, ‘woocommerce_cookbook_subscription_price_string’, 10, 2 ); add_filter(‘woocommerce_subscriptions_product_price_string’ , ‘woocommerce_cookbook_subscription_price_string’, 10, 2
);
Now we need to write the modifications. Add the following code:
function woocommerce_cookbook_subscription_price_string(
$subscription_string, $product ) {
$subscription_string = $subscription_string . ‘. In
2016 all subscriptions will get a price increase. Buy now to be grandfathered in.’; return $subscription_string; }
- Save and upload the file to your site.
Look at your subscription on the frontend and you can see the addition we made to the price string.
There’s more…
There are dozens of filters you can use to modify all sorts of things in Subscriptions. If you’re a developer, you can read through the developer docs at http://docs.woothemes.com/ document/subscriptions/develop/.
Creating a custom subscription interval
The Subscriptions plugin already gives you the ability to create a day-long subscription, a month-long subscription, and subscriptions that can renew every other week. While it has a lot of intervals, it can’t possibly have every one. If you want to have a subscription that renews every tenth week, you’ll have to create a custom subscription interval. Using filters in Subscriptions, we can easily add this.
Getting ready
You must have the WooCommerce Subscriptions plugin installed and activated on your site. You should also have a subscription product already created.
How to do it…
In order to create a custom subscription interval, go through the following steps:
- Open up your theme’s functions.php file, located under wp-content/themes/ your-theme-name/, or create a custom WooCommerce plugin and open up that file.
- Add the following line of code. This tells Subscriptions to look for your modifications to the possible intervals: add_filter(
‘woocommerce_subscription_period_interval_strings’,
‘woocommerce_cookbook_subscription_intervals’ );
- Now add the following code. This will actually add the extra intervals:
function woocommerce_cookbook_subscription_intervals(
$intervals ) {
$intervals[10] = sprintf( __( ‘every %s’,
‘woocommerce-cookbook’ ),
WC_Subscriptions::append_numeral_suffix( 10 ) ); return $intervals; }
Note that there were two places where we put in our custom interval (10) in that string. If you want a different interval, then you should replace both instances of 10 with your desired number.
Now that we’ve created our custom interval, we need to edit our subscription product to use that interval.
- In the WordPress admin, click on Products and navigate to your subscription product.
- On the edit page, if you scroll down to the Product Data panel, you can now choose your custom interval.
Exporting subscription orders
If you are using Subscriptions to manage all of the billing and you plan on using another system for some other part of your subscriptions, you will need to know who is an active subscriber. There are some plugins out there that do just this.
Getting ready
You must have the WooCommerce Subscriptions plugin installed and activated on your site. You should also have a subscription product already created.
You will also need to purchase and install the WooCommerce Subscription Exporter plugin from http://codecanyon.net/item/woocommerce-subscriptionexporter/6569668.
How to do it…
To export subscription orders, perform the following steps:
- From the WordPress admin, go to WooCommerce | Subscriptions Export.
- Under Subscriptions, make sure Active is checked.
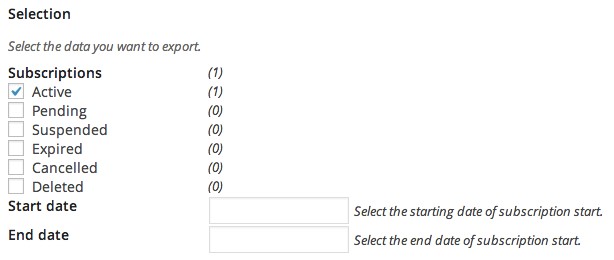
- Click on Calculate Export Size and wait for the page to reload.
- Then click on Export.
- A CSV file will download that you can then upload into any other system.
There’s more…
The default options for this plugin are quite useful and most likely don’t need to be changed. However, if you need special formatting for your CSV file, you can manipulate all sorts of settings by going to WooCommerce | Subscriptions Export | Options.
You can do a lot with the WooCommerce Subscription Exporter extension—more than just exporting active subscribers. You could also run a report that lists all users who cancelled their subscription in the past three months. You could get all of their e-mails and ask them why they left. Exporting active subscribers is really just the beginning.