
Adding Products
In this chapter, we will cover:
- Adding a simple product Adding an image gallery to a product Changing image sizes in WooCommerce Adding a downloadable file to a product Adding global product attributes Adding a variable product Adding an extra fee to a product with the Product Add-ons plugin Adding a product bundle with the Product Bundles plugin Bulk-uploading products with a CSV file Removing product tabs Reordering product tabs
Introduction
In Chapter 1, WooCommerce Basics, you set up your store. The recipes in this chapter are all about adding products to your store. There are many different ways to configure your products. Knowing a little bit about each will help you decide how you want to display your products to your customer. Near the end of the chapter, we’ll also touch on removing or reorganizing some of the information on the product page.
WooCommerce started with just simple and variable products. Over the years, other developers have come in and created different ways to sell products. In this chapter, we’ll look at simple products, variable products, the Product Add-ons plugin, and the Product Bundles plugin. There are other ways to configure your products, but these are some of the most commonly used ones. At the end of this chapter, you should have all of the products in your store configured the way you want them. In Chapter 3, Changing the Product Organization, we’ll cover how to manipulate the product page that the customer sees.
Adding a simple product
The best place to start when learning how you can add products to WooCommerce is to add a simple product. A simple product is the most basic product that you can create in
WooCommerce. All other product types are based on the simple product and add extra controls.
How to do it…
In order to add a simple product to WooCommerce, take a look at the following steps:
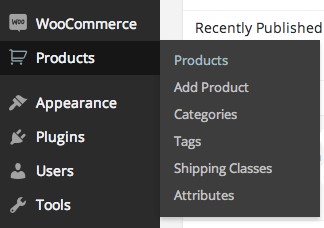
- Go to Products | Add Product.
- Enter the name of the product in the Product name field. In the text editor right beneath the Product name field, enter the product’s description. In most themes, this copy will appear beneath the product, so you could write paragraphs and paragraphs if you wish.
- Scroll down to the Product Data panel.
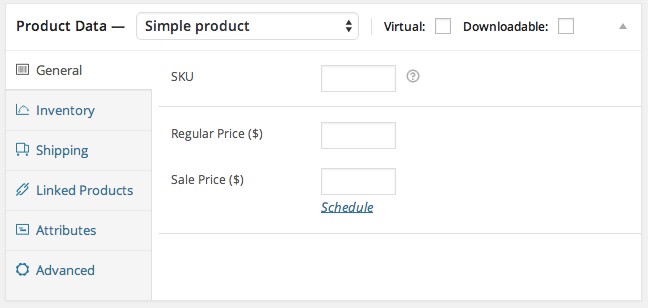
- Enter the product’s price in the Regular Price ($) field.
- Scroll down to the Product Short Description panel and enter a short description of the product. This copy will appear above the Buy button, so it’s best if it’s only one or two lines. It is usually a summary of the full description.

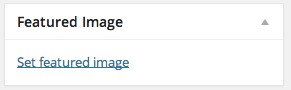
- Look for the Featured Image panel in the sidebar. Click on Set featured image and then, in the pop-up that appears, either pick an existing image or upload an image.
- Click on the Publish button.
This is, of course, just the tip of the iceberg. It is the bare minimum amount of information necessary to sell a product.
If you’re already comfortable with WordPress and how categories and tags work, you could add those to your product at this point.
In subsequent recipes, we’ll add even more information to your products.
Adding an image gallery to a product
One of the things that can really sell a product is having high-quality visuals. For some types of products, you may only need one photo. For other markets, especially upper-scale markets, the more photos, the better. Included in WooCommerce is the ability to show off a gallery of images.
Getting ready
You need to have a product on your site. If you haven’t already done this, please follow the steps in the preceding recipe, Adding a simple product.
How to do it…
In order to add an image gallery to a product, go through the following steps:
- In the WordPress admin, click on the Products menu and navigate to your product.
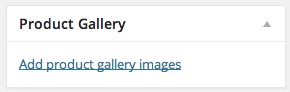
- Once you’re on the product detail page, look for the Product Gallery meta box and click on Add product gallery images.
- Just like with the Featured Image configuration, you can either select existing images or upload as many images as you like.
- Now that you’ve added the images to the product gallery, you can arrange them however you like by clicking-and-dragging them into any order.
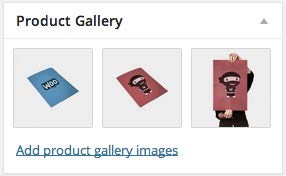
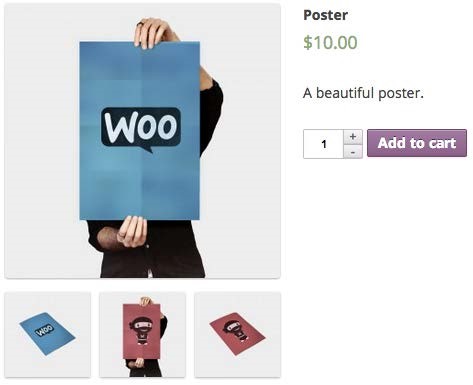
- Click on Update and you should have a beautiful gallery for your product.
Changing image sizes in WooCommerce
If your products fit nicely into perfectly square images and they look good as they are in your theme, then you can probably skip this recipe. For some themes or some types of products, though, it’s really beneficial to change how WooCommerce crops your images. If you’re selling ties, for example, it’s probably worth telling WooCommerce to crop them so they’re long and skinny.
Getting ready
It’s best if you have already created a couple of products and look at them to compare how the Featured Image and the Product Gallery look on their product pages. If you see gaps around the images, you may be able to increase the product image size and take advantage of that space.
How to do it…
Changing image sizes can be done in two parts. The first part will change the settings, and this will affect all future uploads. The second part will install a plugin that will force your website to recrop every image, which will affect all past uploads. Let’s have a look at the following steps that depict these two parts:
- From the WordPress admin, go to WooCommerce | Settings.
- Click on the Products tab.
- Click on the Display tab and then scroll down to Product Image Sizes.
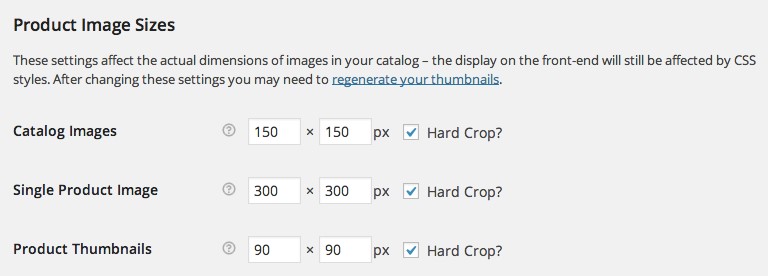
- Enter your new sizes.
- Catalog Images controls the size on the shop page and category pages.
- Single Product Image controls the size of the featured image on the product page.
- Product Thumbnails controls the size of the gallery thumbnails on the product page.
- When you’re done, click on the Save changes button at the bottom of the page.
Now that you have the new images set, any future uploads will use those settings. We’ll have to install a free plugin to resize all of the existing images. Let’s have a look at the following steps that illustrate the step-by-step installation of this plugin:
- Add a new plugin under Plugins | Add New.
- Run a search for, and install and activate, the Regenerate Thumbnails plugin.
- Click on Tools | Regen. Thumbnails.
- Click on Regenerate All Thumbnails and wait for your site to process all of the images.
You should now be able to go back to any of your product pages and see the new image size. In my case, I made the main featured image tall and skinny by setting Single Product Image to 150 x 300.

We are now done with changing the image sizes for your products.
You might be able to see a little bit of distortion in my image. That’s because I uploaded an image that’s too small. WooCommerce blew it up to fit the dimensions I specified. If you don’t want to have blurry images, the best piece
of advice is to upload high-quality large images. You can also follow this video
tutorial at http://docs.woothemes.com/document/using-theappropriate-product-image-dimensions/. If you want to learn more about the different ways you can crop images and what the different types of cropping are, there is a great article on WPExplorer at http:// www.wpexplorer.com/wordpress-image-crop-sizes/.
Adding a downloadable file to a product
WooCommerce is just as good to sell virtual products as it is to sell physical products. The beauty of the way it’s set up is that any product type can be a virtual product. It could be a simple product, a variable product, a subscription product (which we’ll cover in Chapter 4, Running a Membership Site), and so on. WooCommerce handles all of the download permissions. Fulfilling virtual products is completely automated. As soon as you receive payment, the customer receives an email with a special link to download to the file.
The simple product I set up in previous recipes is a poster. I could change this product so that it includes a digital download in addition to the physical product or I could even change it so that the customer only receives a digital download and there is no physical product shipped.
Getting ready
Make sure you already have a simple product in your store.
How to do it…
In the first section, I’m going to add a downloadable file to a product. The customer will receive the download immediately and the physical product after it’s shipped. In the second section, we’ll show you how to make the product only sell a downloadable file and skip the whole shipping process. Let’s have a look at the following steps:
- In the WordPress admin, click on the Products menu and navigate to your product.
- Under the Product Data panel, you’ll see a Downloadable checkbox. Check it.
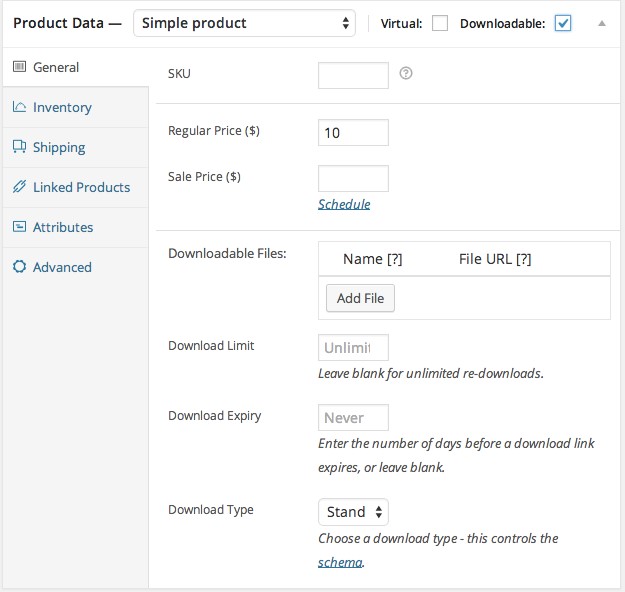
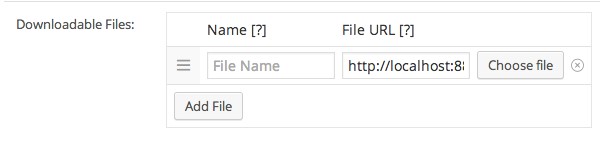
- Under Downloadable Files, click on the Add File button. You can add as many downloadable files as you wish.
- The File URL will automatically be filled in. You can now enter a friendly name for the file that the user will see. This could be something like woo-poster.
At this point, you can fill in the additional download settings. This is purely optional. Some store owners like to lock down the downloads, preventing them from being downloaded too many times.
If you have a product that’s purely virtual and doesn’t ship any physical component, there’s a little bit more we should do.
- On the Product Data panel, check the Virtual checkbox.

Now your product will skip the shipping process altogether. Note that the shipping tab on the Product Data panel has disappeared since there are no shipping settings for virtual products.
We haven’t looked at orders yet, but it’s worth mentioning that any orders that are composed entirely of downloadable and virtual products will be automatically marked as completed.
Most users don’t have to change the download default settings but, if you want to take a look, they are all available in the WordPress admin under WooCommerce | Settings | Products | Downloadable Products.
Adding global product attributes
In addition to using categories and tags similar to WordPress posts, there’s one extra way that you can categorize your products, and that is by using product attributes. Product attributes are things such as color, size, style, and so on. A simple product could have multiple attributes. A small red and blue t-shirt could have the following attributes: red, blue, and small.
Setting up global product attributes will make creating variable products easier down the road.
How to do it…
Make sure you already have a simple product in your store and proceed with the following steps:
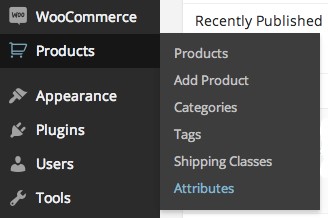
- From the WordPress admin, go to Products | Attributes.
- Under the Add New Attribute heading, you’ll see settings to create attributes. The only mandatory field is Name.
- Enter a name for the attribute and click on the Add Attribute button.
- Now click on the icon on the far right in the Attribute table. When you hover over the button, you should see Configure terms.

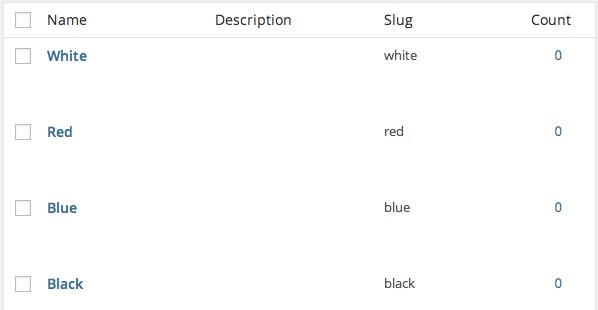
- Enter a name for an attribute term. If your attribute is Color, then the attribute terms will be specific colors such as red, black, blue, white, and so on. Repeat this step for each attribute term. At the end, you should have a list of attribute terms.
We’ve created a product attribute and some attribute terms. Now we can add them to our products.
- From the WordPress admin, go to the Product page and click on Edit for any one of your products.
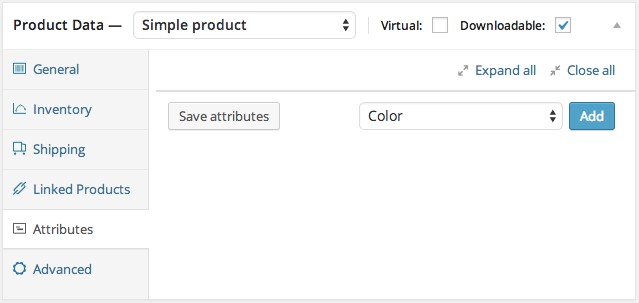
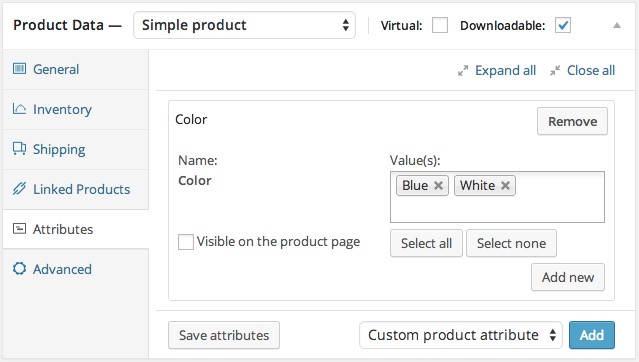
- Under the Product Data panel, click on the Attributes tab.
- You should see a drop-down with a list of attributes. Select your attribute and then click on the Add button.
- Start typing in the attributes that apply to this product. As you type, a suggestion tool will pop up that helps you select an attribute.
- Now save your product by clicking on the Update button.
There’s more…
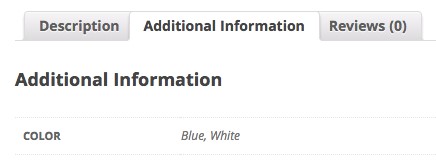
If you check the Visible on the product page checkbox under the attribute you selected on the Attributes tab in the Product Data panel, these attributes will show up on the product page in an Additional Information tab.
In Chapter 3, Changing the Product Organization, there’s a recipe (Adding filtered navigation with the Layered Nav widget) that details how to filter your products with the Layered Nav widget. By adding attributes to your products, you make it easier for users to navigate your store and search for your products.
Adding a variable product
One of the complexities of e-commerce stores is figuring out how to sell similar products; for example, the same t-shirt design in different sizes and colors. Do you sell each size and color as a separate product with its own product page or do you combine them somehow?
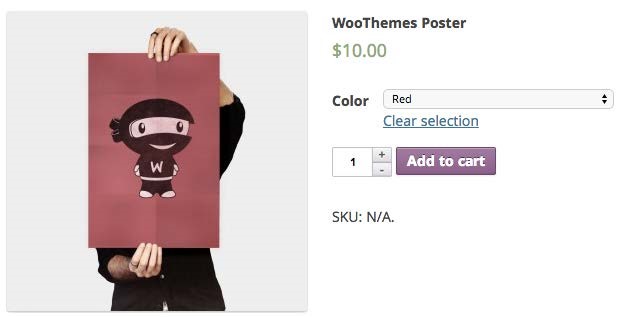
WooCommerce handles this with variable products. Variable products can have multiple attributes such as size and color to help you sell these products. Throughout this chapter, I’ve been creating a poster product and attributes. I’m going to use the same data in this recipe as well, except that this time I’m going to create a variable product so people can choose the color of the poster.
Getting ready
You’ll need to have set up global product attributes in the preceding recipe.
How to do it…
There are two basic parts to this. The first part is setting up the attributes this variation will use to distinguish between the different variations. The second part will define how each variation is different.
- From the WordPress admin, go to Products | Add Product.
- Just as with a simple product, add the Product name and Featured Image.
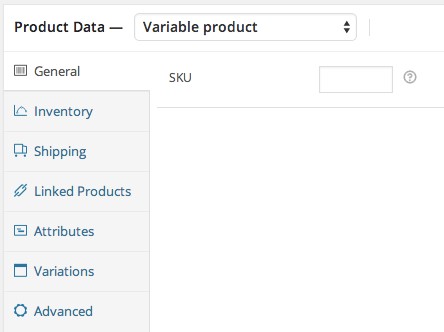
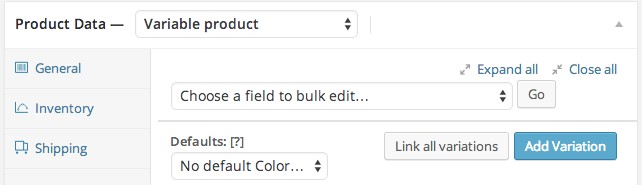
- Scroll down to the Product Data panel and, from the drop-down, select Variable product. You may notice a few of the settings in the panel have been moved around.
- Click on the Attributes tab. You have to add attributes before you can add variations.
- Select one of the global product attributes we created in the previous recipe and click on Add.
- The poster I’m creating comes in blue and red. I’m going to select those attribute terms.
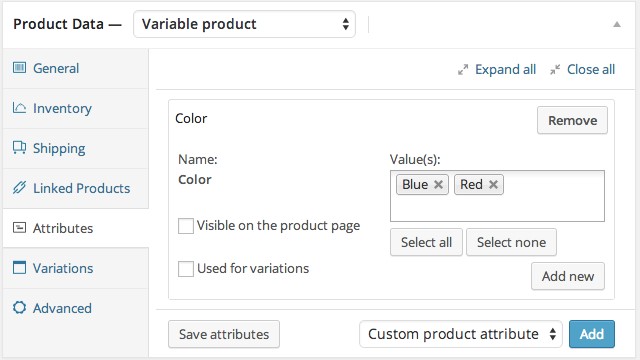
8. Click on the Save attributes button.
By this point, we’ve told WooCommerce the attributes we’re using to distinguish between the different variations. Now it’s time to create our variations and tell WooCommerce how each one is different.
- Click on the Variations tab in the Product Data panel.
- Click on Add Variation.
- Select your attribute in the drop-down, enter a price, and upload an image for that variation.
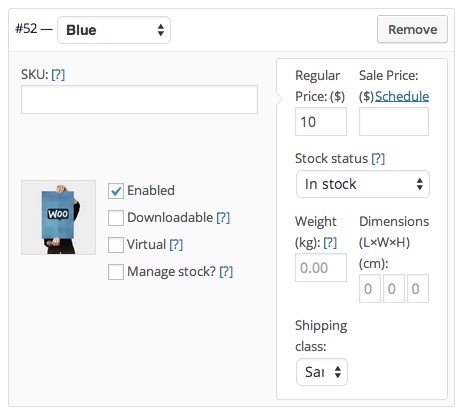
- Repeat this for as many variations as you have. For my example, I’ll be doing it one more time for the red variation.
- Once you’re all done, click on Publish.
| Adding an extra fee to a product with the |
| Product Add-ons plugin |
Variable products are incredibly powerful and you can do a lot with them. In some situations where you have a ton of extras or add-ons, it doesn’t make sense to make a variation for each one. In such cases, it’s easier to use a separate plugin that WooThemes has created, called Product Add-ons.
Getting ready
You’ll need to have installed and activated the Product Add-ons plugin available at http://www.woothemes.com/products/product-add-ons/.
You should also have a product in your store.
How to do it…
We can add an add-on cost with the help of the following steps:
- From the WordPress admin, go to the Products page and click on Edit for any one of your products.
- Scroll down to the Product Data panel and click on the Add-ons tab.
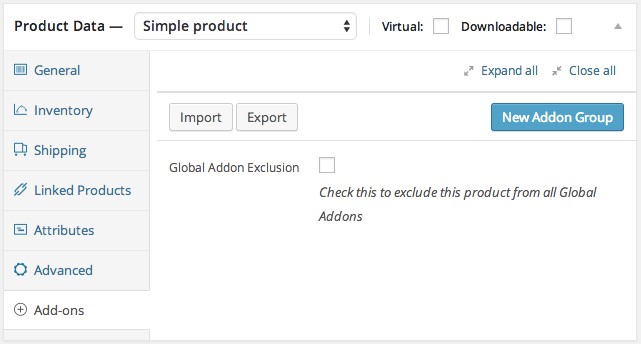
- Click on the New Addon Group button.
- Type in the name of the add-on group. If you’re selling frames for your poster, you probably want to call it Frame.
- You can now add as many options as you want. Make sure you enter a label and price for each one.
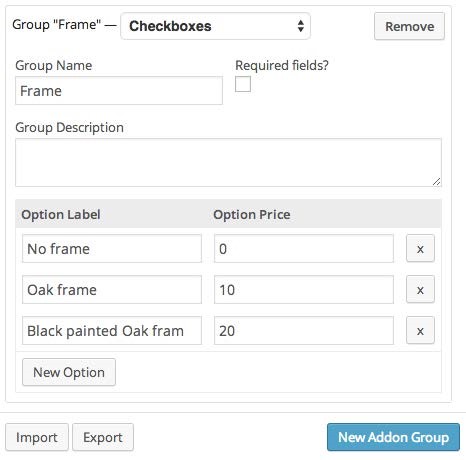
- Click on the Update button.
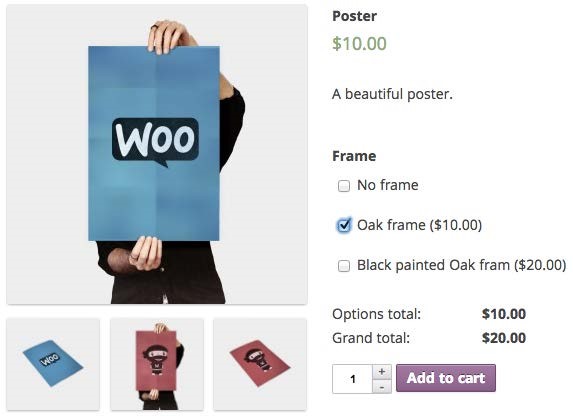
You now have plenty of options to choose from on the frontend.
There’s more…
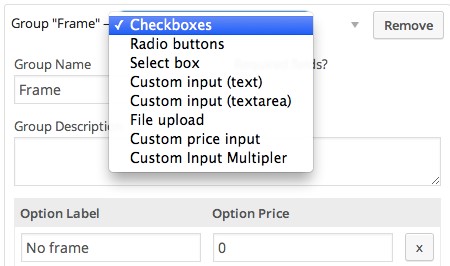
There are different ways to use add-ons. With frames for a poster, it might make sense to only let the user choose one add-on. In such cases, you can change the Group “Frame” setting to use Radio buttons instead of Checkboxes.
| Adding a product bundle with the Product |
| Bundles plugin |
One of the most common ways through which both physical stores and e-commerce stores get more orders is by bundling products together and providing the customer with a discount. This can actually be a bit tricky in e-commerce if you don’t set it up correctly. You’ll most likely want to count the products independently for accounting, inventory, and reporting purposes. That’s why there’s a Product Bundles extension that handles all of that stuff while the customer just sees a product and the Buy button.
Getting ready
You’ll need to have installed and activated the Product Bundles plugin available here:
http://www.woothemes.com/products/product-bundles/. You should also have at least two simple products in your store.
How to do it…
In order to add a product bundle, carry out the following steps:
- From the WordPress admin, go to Products | Add Product.
- Give the product a name in the Product Name field.
- Scroll down to the Product Data pane. From the drop-down, select Product bundle.
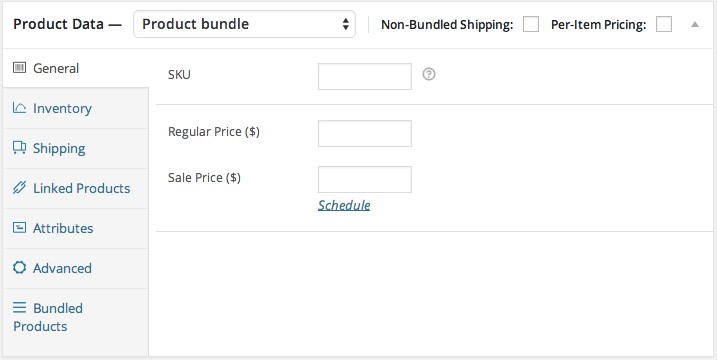
- If your products are packaged separately, check the Non-Bundled Shipping checkbox.
- Enter a price for the bundle in the Regular Price ($) field.
- Click on the Bundled Products tab.
- Under Bundled Products, type in the products that will make up the bundle.
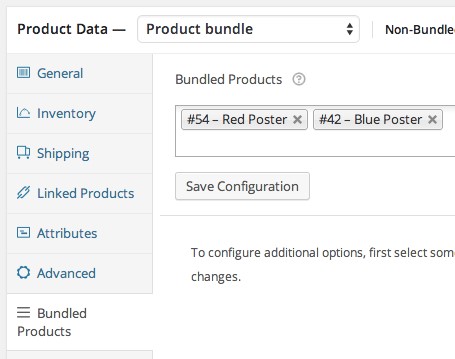
- Click on Save Configuration.
- After the configuration is saved, you can click on each component and adjust several details such as the quantity in each bundle. Adjusting these details is optional.
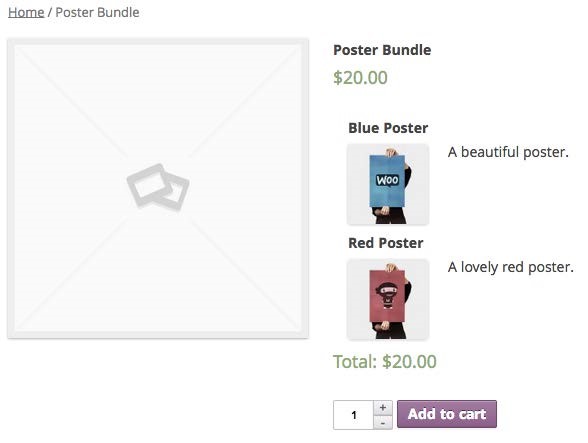
- Publish your product and take a look at it from the frontend of your site.
There’s more…
You’ll want to go back and add a featured image, and possibly an image gallery, for the bundle. It’s really helpful to show the user exactly what they’re getting in the bundle so make sure the featured image shows all of the items in the bundle.
Bundles are one of the more common ways of combining products, but there are other ways.
For a full guide on the many ways of doing this, see the comparison article at http://docs. woothemes.com/document/chained-products-vs-product-bundles-vs-forcesells-vs-grouped-products/.
Bulk-uploading products with a CSV File
By now, you should have a pretty good idea of how you can configure your products. You’re probably ready to set up all of your products and get this WooCommerce site up-and-running! If you only have a handful of products, I encourage you to do so. If you have hundreds or thousands of products, you can save yourself a whole lot of time by learning how to upload products in bulk.
Getting ready
You’ll need to have installed and activated the Product CSV Import Suite plugin, available at http://www.woothemes.com/products/product-csv-import-suite/.
You should also have a simple product in your store.
There are free CSV uploaders in the WordPress.org repository that you could use. I would, however, advise caution. They’re not as well maintained and, if there is a bug, your database could be filled with thousands of records that clutter everything up.
How to do it…
There’s a trick to uploading your products that most people aren’t aware of. It adds an extra step in the beginning, but it makes the whole process much easier. The first part is actually exporting some products from your store. By exporting them, you’ll know the exact format you have to use to upload them.
- From the WordPress admin, go to WooCommerce | CSV Import Suite.
- Click on the Export Products tab.
There are a bunch of settings on this page. You could very easily limit how many products are exported. This isn’t really a concern for new stores. If you have a 100 or fewer products, just export everything.
- Click on Export Products. A woocommerce-product-export.csv file should be saved to your computer.
- Now open the downloaded file with your favorite calculation program. I like Sheets in Google Docs, but you could also use Microsoft Excel or Numbers for Macs.
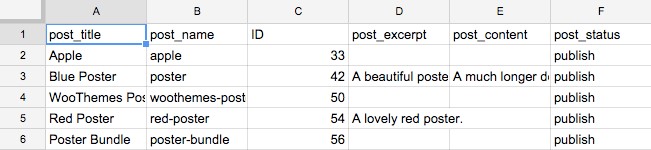
You can now use the existing products in your exported file as a template for new products. I have a red poster and a blue poster in my sheet. I’m going to use those as a template for a green poster.
You can leave the ID and post_date fields blank. They will be automatically calculated.
Now that you have your CSV file created, you can upload it. Follow these steps:
- From the WordPress admin, go to WooCommerce | CSV Import Suite.
- Click on the Import Products button.
- Click on the Choose File button and select the file from your computer.
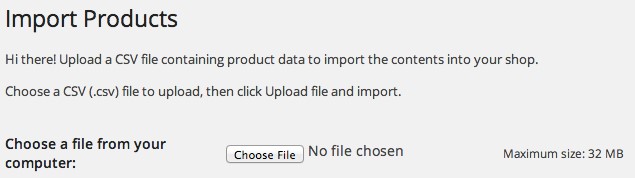
- Click on Submit at the bottom of the page and wait for the products to upload.
There’s more…
The CSV Import Suite can import either only simple products or only variable products. Don’t try to import both at the same time. The steps are almost identical. Instead of clicking on the Import Products button on the CSV Import Suite screen, you must click on the Import Variations button.
The process of uploading variable products is slightly different
and is documented at http://docs.woothemes.com/ document/product-csv-import-suite-importingproduct-variations/.
Removing product tabs
WooCommerce prints out all of the information about your products, which is generally pretty useful information for your customers. Sometimes, however, you may want to hide some of that information. With a bit of code, it’s pretty easy to hide the product tabs.
Getting ready
You should have a simple product in your store.
How to do it…
To remove product tabs, we perform the following steps:
- Go to one of your products and find the tabs near the bottom of the product page, underneath the products’ short description and the buy button.
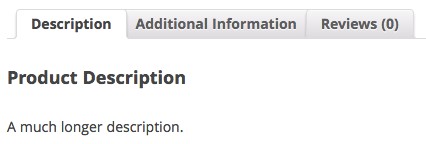
- Use a tool that allows you to browse the source of an HTML page. I’m using Google Chrome’s Inspect Element; you could also use Firebug from FireFox.
- You should be able to find tabs in the source code.
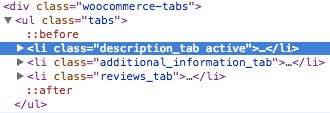
- Write down any of the classes of the tabs you want to hide. Omit the _tab syntax at the end of the class. You just need the first part.
- Now that we have the classes, we can write some code to hide those tabs. In your theme’s functions.php file, add the following code:
add_filter( ‘woocommerce_product_tabs’,
‘woocommerce_cookbook_remove_product_tabs’, 10 ); function woocommerce_cookbook_remove_product_tabs( $tabs )
{
return $tabs; }
- Now, in the woocommerce_cookbook_remove_product_tabs function, we have to specify exactly which tabs we want to remove. Just before the return $tabs; line, add the following code:
unset( $tabs[‘description’] );
- Replace description with the class of the tab you want to remove. For example, it could read unset( $tabs[‘description’] ); or unset( $tabs[additional_information] ); or something else based on extra plugins adding more tabs.
- Save the file and upload it to your site.
How it works…
The woocommerce_product_tabs filter allows you to add, rearrange, or remove tabs to suit your liking.
There’s more…
It’s actually a best practice to put this code in its own plugin rather than in your theme’s functions.php file. For more details, refer to the Creating a WooCommerce plugin recipe in Chapter 1, WooCommerce Basics.
Reordering product tabs
You may not want to remove product tabs entirely. You may only want to rearrange them. That can also be done with a bit of code.
Getting ready
You should know how to find the product tab ID. This is discussed in the first part of the preceding recipe, Removing product tabs.
How to do it…
To reorder product tabs, take a look at the following steps:
- Open up your theme’s functions.php file, or a custom WooCommerce plugin that you have created, and paste in the following:
add_filter( ‘woocommerce_product_tabs’, ‘woocommerce_cookbook_reorder_tabs’, 98 ); function woocommerce_cookbook_reorder_tabs( $tabs )
{
return $tabs; }
- In the woocommerce_cookbook_reorder_tabs function, you’ll want to paste in the new order. Add the following code before the return $tabs; statement:
if( isset( $tabs[‘reviews’][‘priority’] ) ){
$tabs[‘reviews’][‘priority’] = 10;
}
if( isset( $tabs[‘description’][‘priority’] ) ){
$tabs[‘description’][‘priority’] = 20;
}
if( isset( $tabs[‘additional_information’][‘priority’] ) ){
$tabs[‘additional_information’][‘priority’] = 30;
}
Downloading the example code
You can download the example code files for all Packt books you have purchased from your account at http://www.packtpub.com.
If you purchased this book elsewhere, you can visit http://www. packtpub.com/support and register to have the files e-mailed directly to you.
- To make one tab appear before another, make sure it has a lower priority. In this case, we’re making the reviews tab show up first, then the description, and finally the additional information tab.
- Save your file(s) and upload them. The product tabs should be rearranged.
How it works…
Just as in the preceding recipe, the woocommerce_product_tabs filter allows us to remove or alter the product tabs. In this case, we’re only setting the priority of each tab. We aren’t altering any other data.